Building an e-ink weather display for our home
This post describes the build-process. You can find more about the software in the GitHub repo.
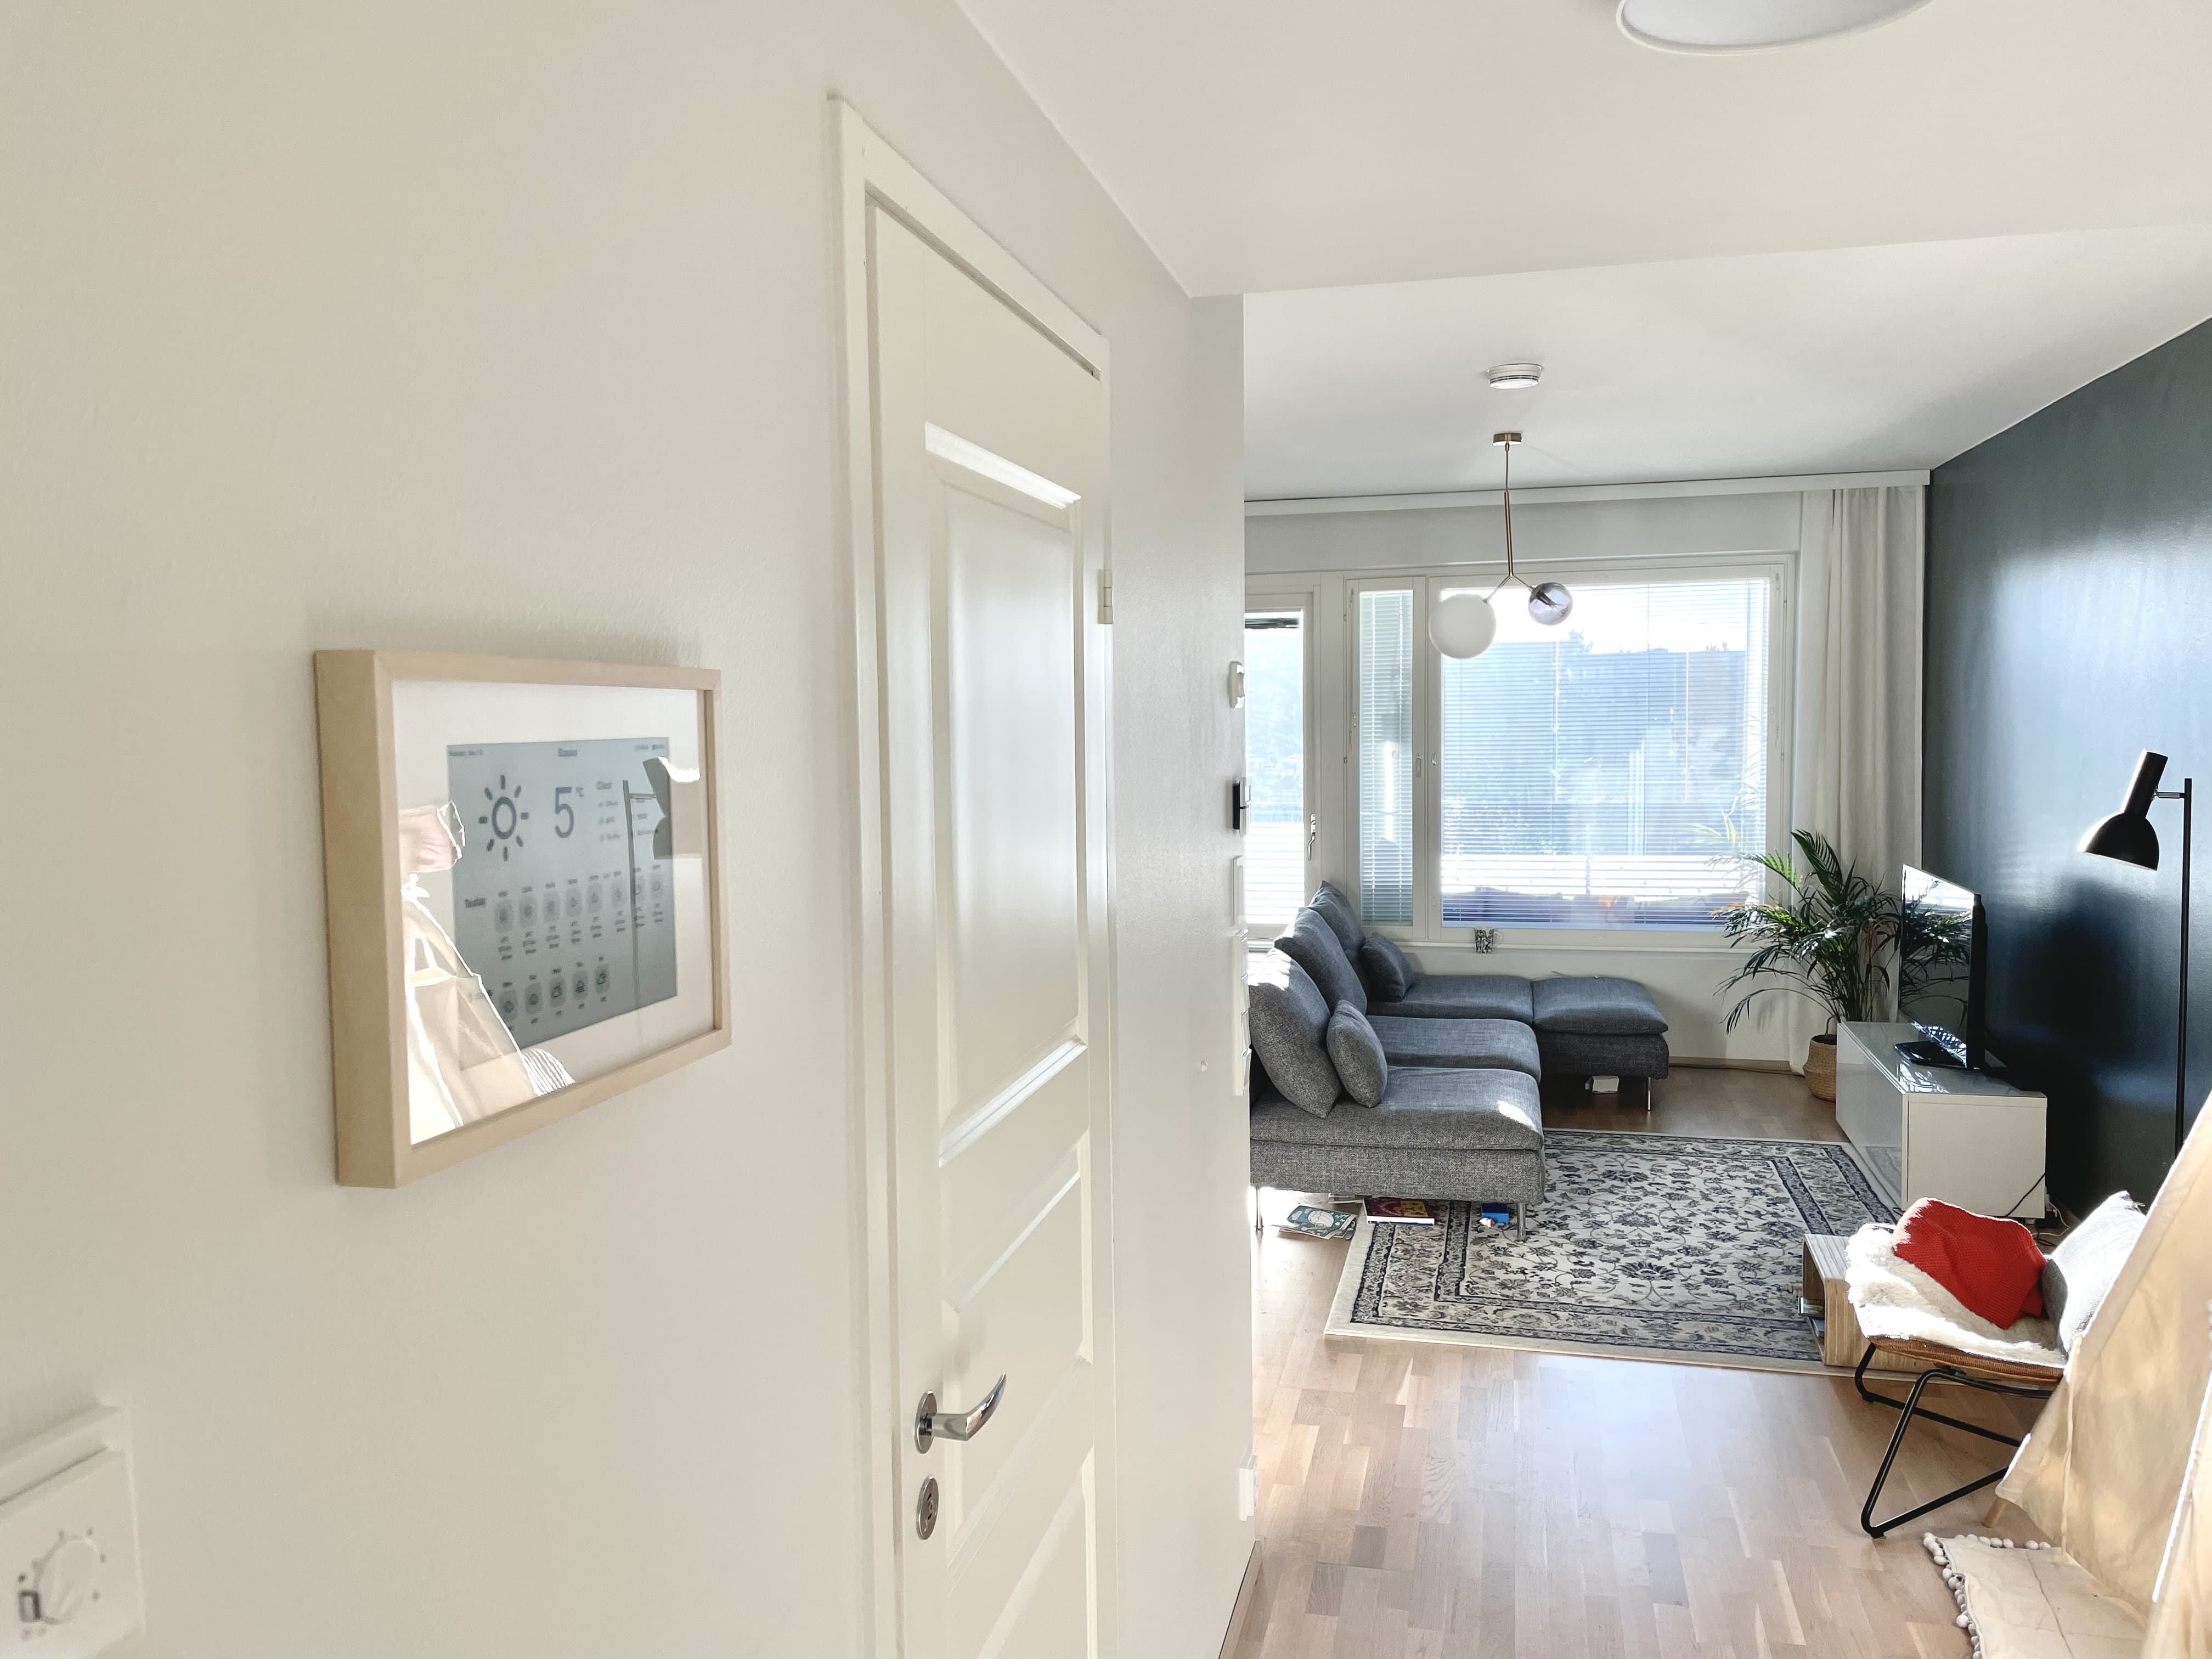
The final build
We almost always want to know today's weather before leaving the apartment. Often the whole event is quite a hassle: getting our daughter dressed, finding all our personal outwear, plus trying to find your phone to check the weather. To make the experience 1% better, the solution obviously needs engineering.
I decided to build a DIY battery powered e-ink weather display for our home. After researching a while, I ended up with a few goals for the build:
- Easily glanceable weather forecast at the heart of our home. Ideally eliminates one more reason to pick up the phone.
- Looks like a "real product". The housing should look professional.
- Fully battery-powered. We didn't want a visible cable, and drilling the cable inside wall wasn't an option.
- Always visible and doesn't light up the hallway during evening / night. This leads to e-ink display.
- Primarily for our use case, but with reusability in mind. For example custom location and timezone. The end result is somewhat tied to Finland due to using the API of Finnish meteorological institute, but nevertheless the design goal was kept in mind.
The goals come with a few challenges:
- Battery life obviously. Fortunately e-ink displays have an interesting property: the rendered image stays visible as is even if all cables are disconnected. It doesn't require any power to keep the image.
- Low refresh speed due to battery life constraint. My plan was to refresh the screen only once or twice a day. That brings interesting design challenges. How do you indicate that the data is not real time? What should we show as the day's temperature: average or maximum for the day?
- Physical constraints by the frame. Ideally it would be flush to the wall behind.
The plan
The device should wake up early in the morning, fetch the latest weather forecast information, update the information to the e-ink display, and go back to deep sleep until tomorrow.
That way, we would have a fresh weather forecast for the day while consuming minimal amount of battery.
Then comes the execution.
Execution
First I designed the weather UI in Figma. This took around 2 days (i.e. evenings after work).
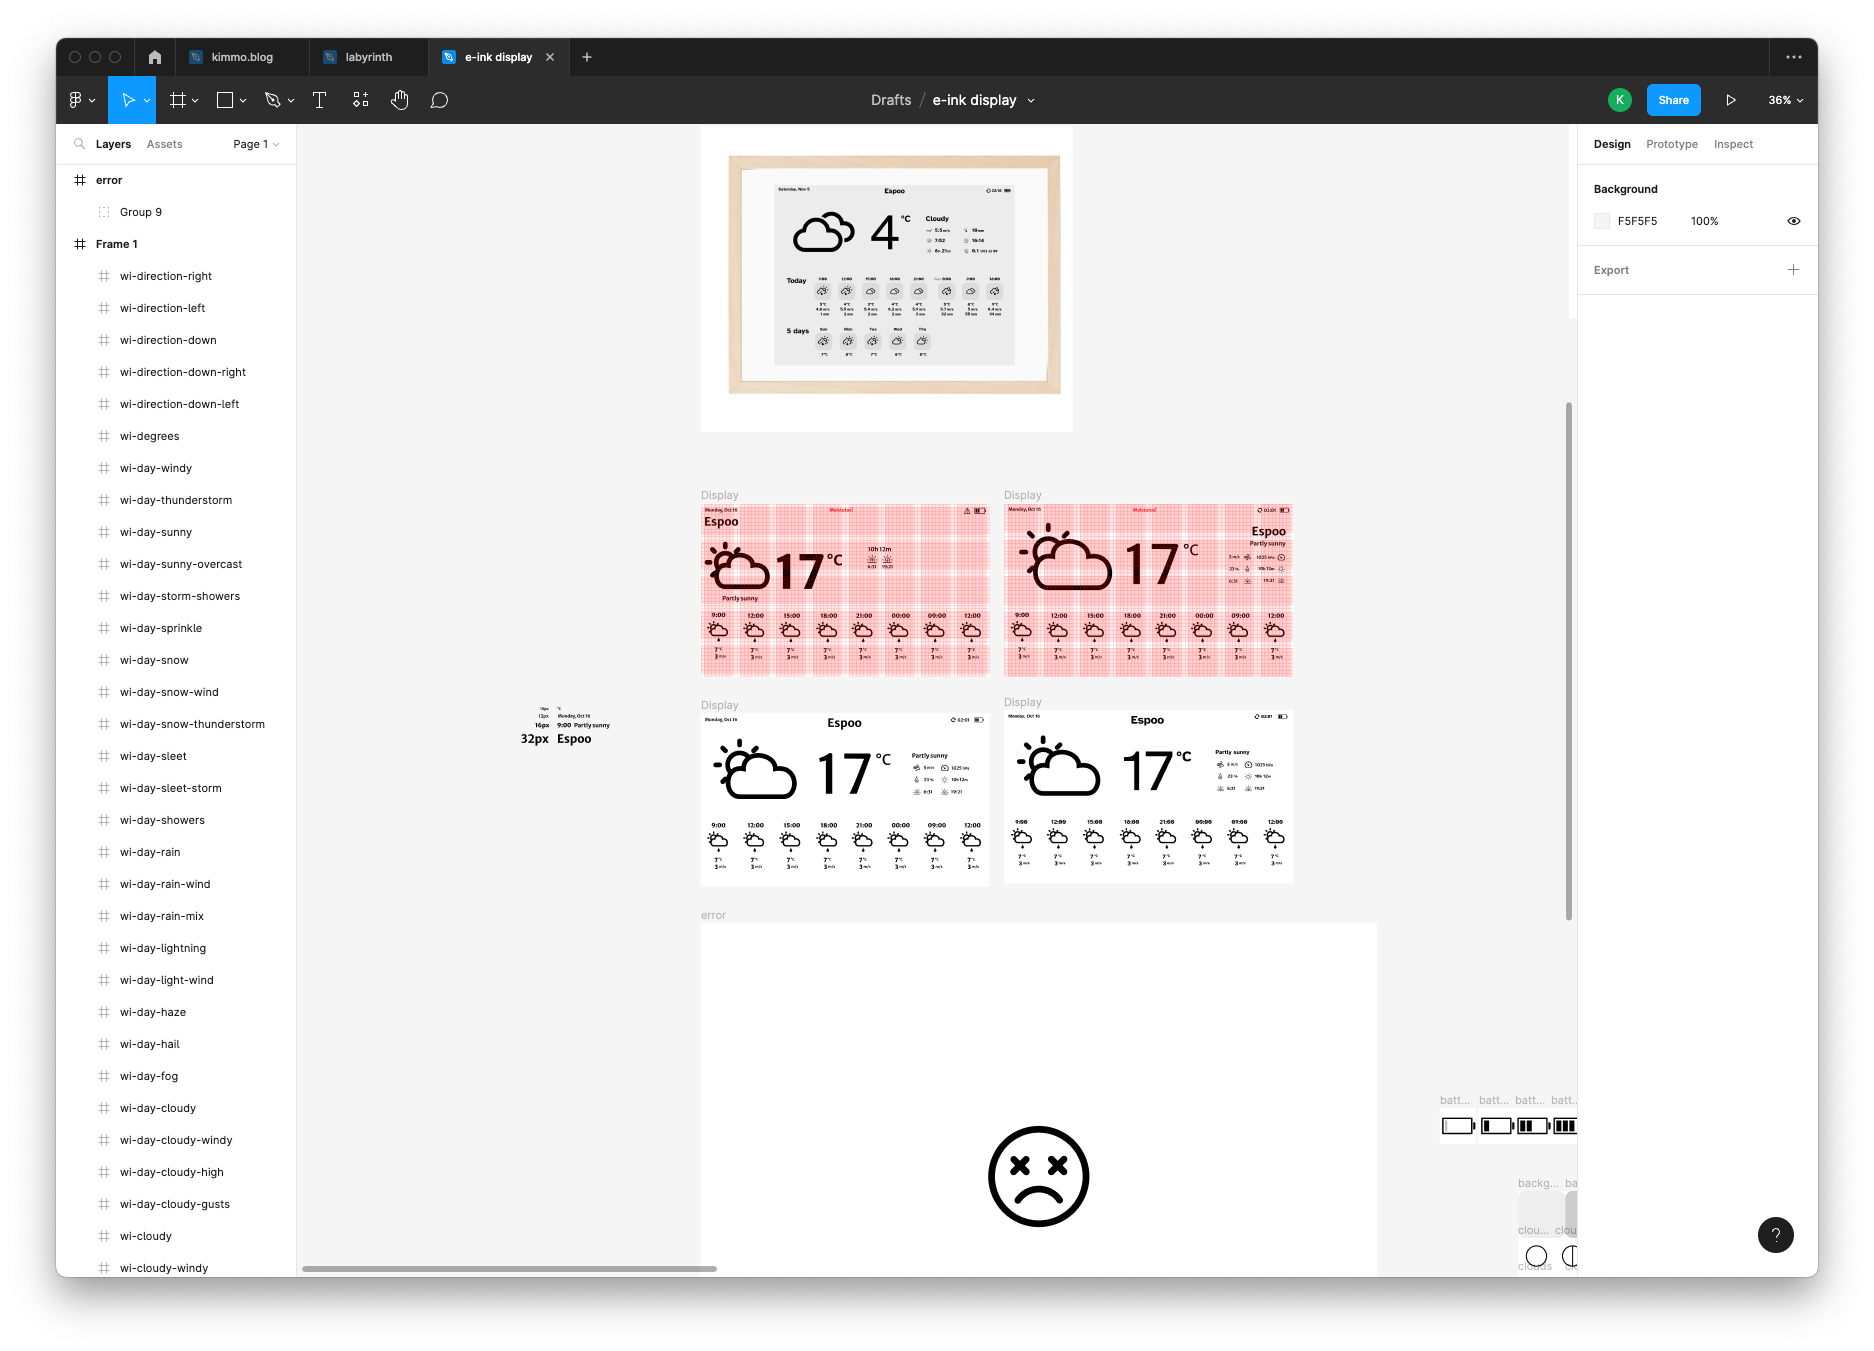
The designs were intended for the Waveshare 7.5" e-ink display. After ordering one, I started looking into good fonts to display in a 1-bit (black and white) screen. It was surprisingly hard to find real 1-bit-screen fonts, so I tested a few sample renders using regular web fonts with and without post-processing:

![]()
![]()
I wasn't super satisfied.. the product would be in a central place in our apartment, so it should look nice.
So... after thinking a bit, I ordered the 10.3" 16-gray-scale (4 bits) display in addition, since it allows text to be anti-aliased. The end result is way smoother. It would've been possible to just live with the 1-bit display constraint, but I decided to use that screen for something else in the future.
On the same day, I also ordered a bunch of other hardware I was expecting to use: SD card, PiJuice chip and battery, standoff screws, GPIO cables and adapters. Fortunately a friend of mine had a spare Raspberry Pi Zero lying around which I could use.
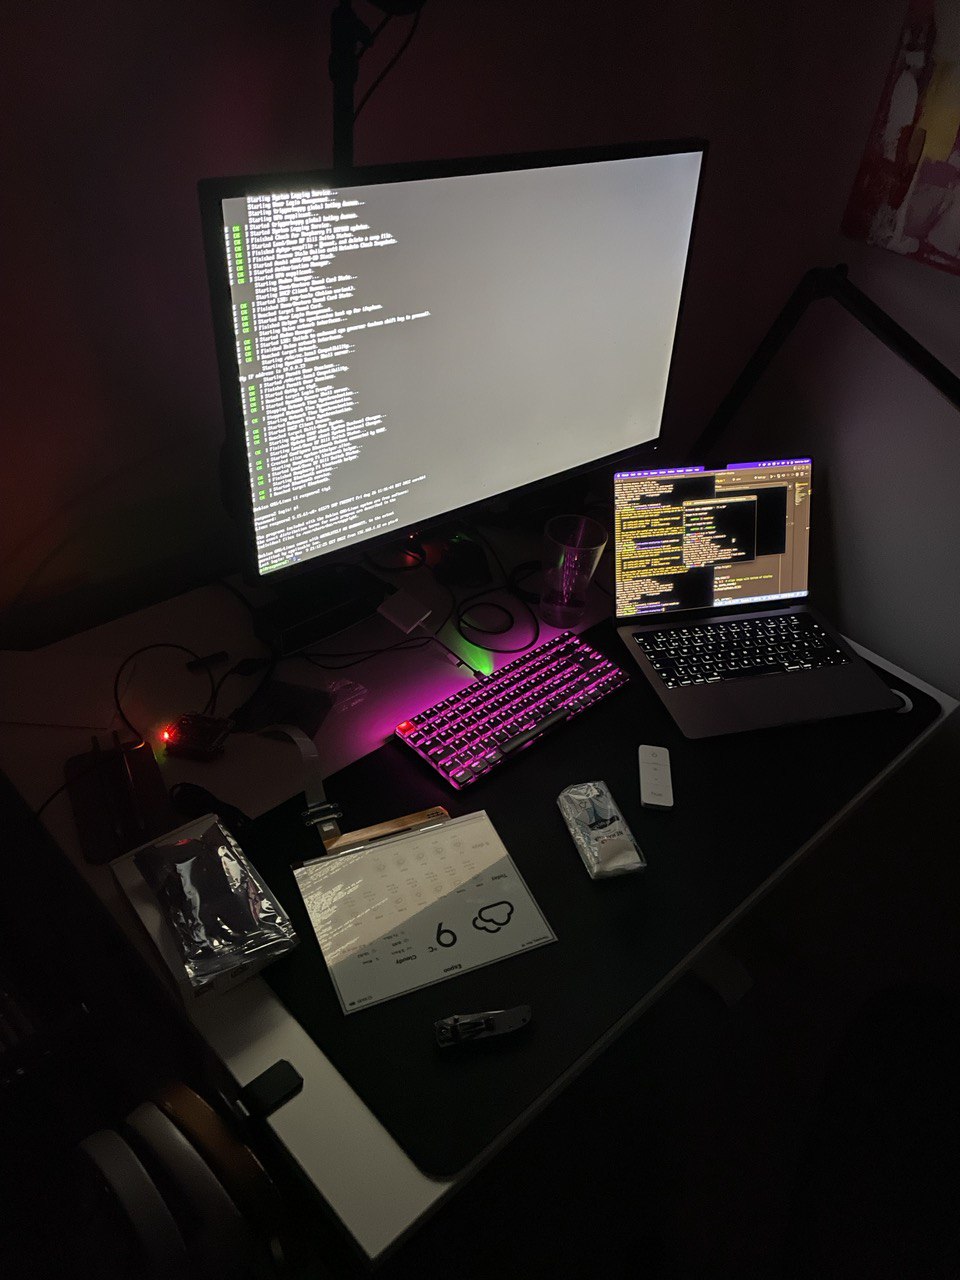
After the Figma designs were ready enough, I started creating the HTML page which is used to render the UI. Many existing projects used lower level libraries such as the Python Imaging Library, but I opted for HTML and CSS. Development is fast when you can edit the HTML and immediately see the result without rendering a raster image after each iteration.
UI development took rougly 1-2 weeks when coding in the evenings and weekends. Having the flu delayed the build a bit unfortunately.

The software vs hardware timing realised like a perfect Gantt chart. As soon as I was done fine-tuning the UI, the hardware arrived in Finland. Nice.
Even though the development was done with the 1872x1404 display resolution in mind, I could finally see how it actually looked. The Raspberry Pi installation and setup took quite some time, but it paid off. It was absolutely amazing to see the UI appear the first time on the e-ink display.
Past bedtime
Everything was surprisingly smooth sailing to this point. But then I assembled all the parts together and realized how small the frame actually is.
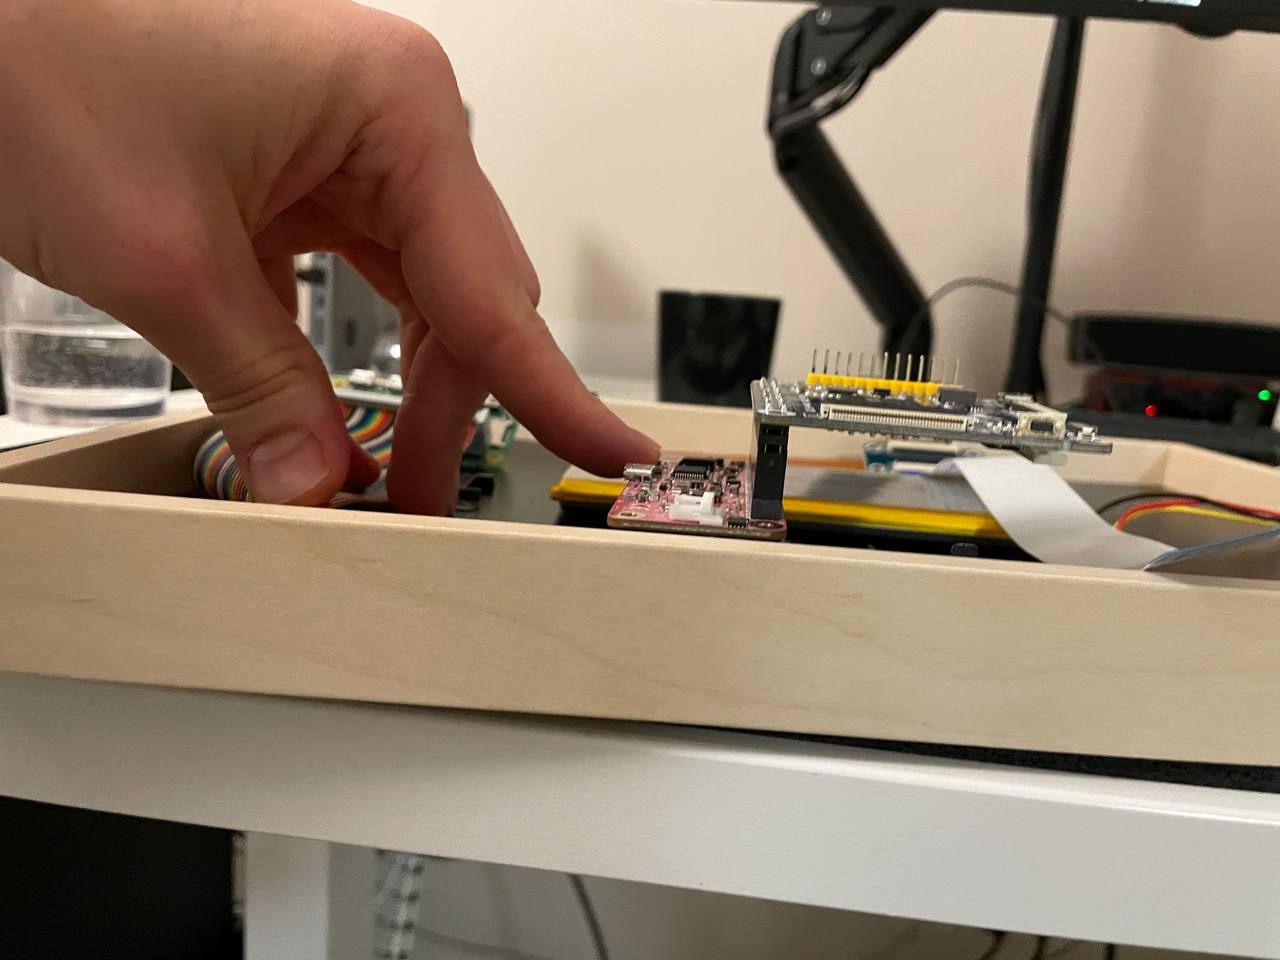
I didn't want to build a larger visible casing to the back, so it was time to go back to the drawing board. I tried to fit everything in the frame by testing all kinds of combinations. This monstrous GPIO cable + 1-to-2 adapter setup almost did the job:

But even after cutting all extra plastic pieces from the cables, it wasn't possible to mount the frame flush to the wall.
Then I realised that the Waveshare demo page featured a Windows app that connected to the controller via the micro-USB interface. Would it be possible to use that to control the display? There weren't any examples of doing that in a Linux box though.
Fortunately for me, some great minds had already thought the same. I connected the controller using USB cables, built the C code in the Raspberry Pi, and tried to clear the display as a test. It worked! What a relief. USB cables are so much smaller than the 40-pin GPIO cables and headers.
Now that I was confident about the USB-strategy, I needed to get rid of the GPIO header of the IT851 controller. The chip was still too tall for the frame with it attached. Fortunately, Helsinki has an amazing library (more like a library, hacker space, gaming cafe, and a public hangout place combined) where I could go and desolder the header for free.
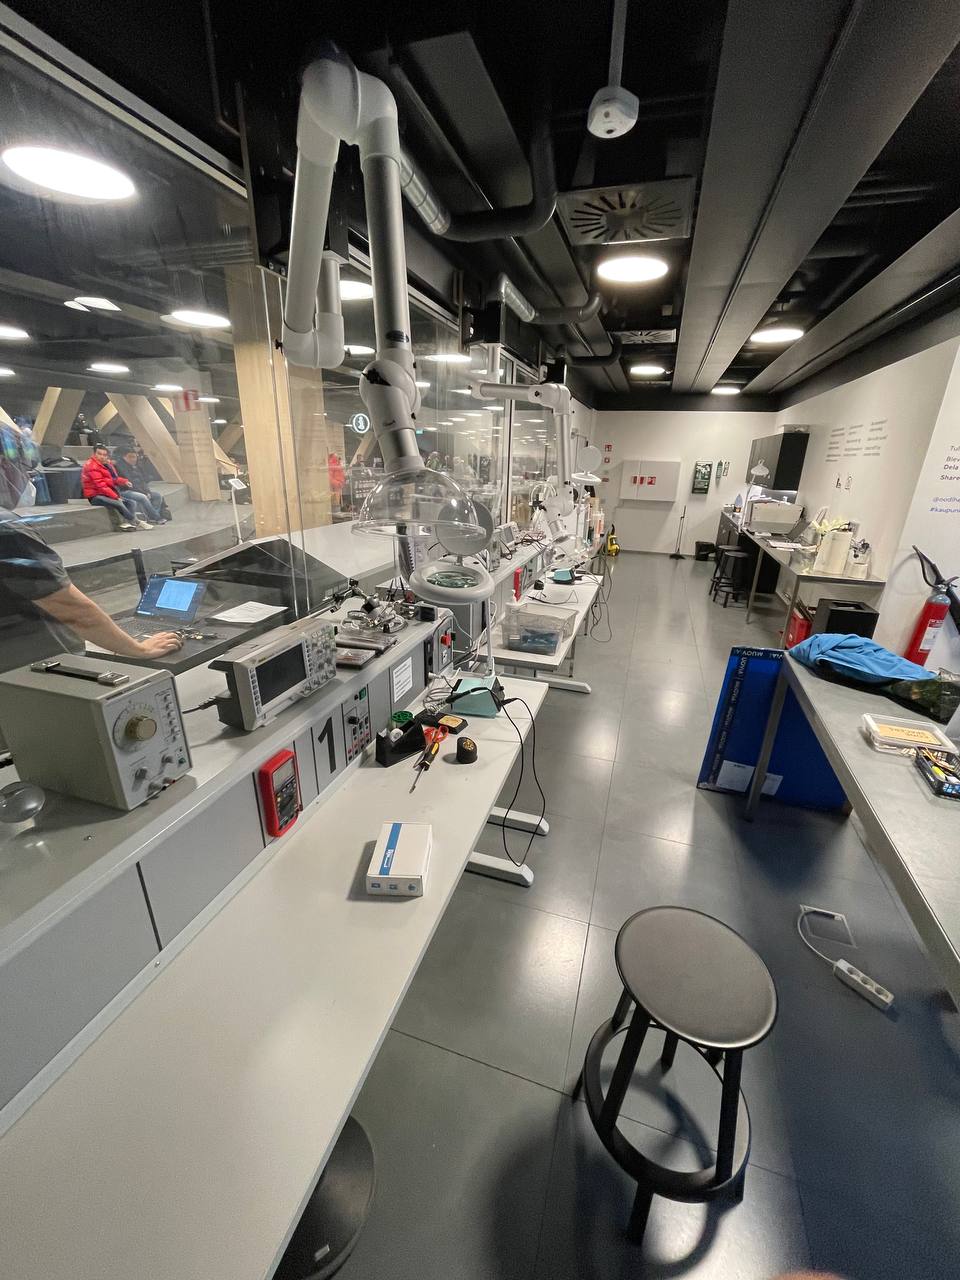
The picture is from the library's electronics room which has cool gear such as laser cutter, 3D printer, and much more.
It's mind-boggling how cool Oodi is architecturally but also functionally.
Unfortunately, my soldering skills weren't as mind-boggling. The estimate that I gave to my wife was that the job would take around 20 minutes. But even after 1.5 hours of desoldering and googling how to desolder components, I wasn't able to rip the header off the chip. My time was up in the soldering lab.
Next strategy was brute force. I took my side cutters and just chopped half of the header off. All I could hope for was that the chip would work after the treatment. With the GPIO header chopped in half, all parts finally fit the IKEA frame nicely!
The unknowns in the software had been solved, and the final assembly could begin. I mounted everything to the IKEA frame using screws and hot glue. The display is super thin, so I avoided placing any screws on the back cover directly behind the display. The back cover bends slightly so the screws could end up damaging the panel while moving the product for charging.
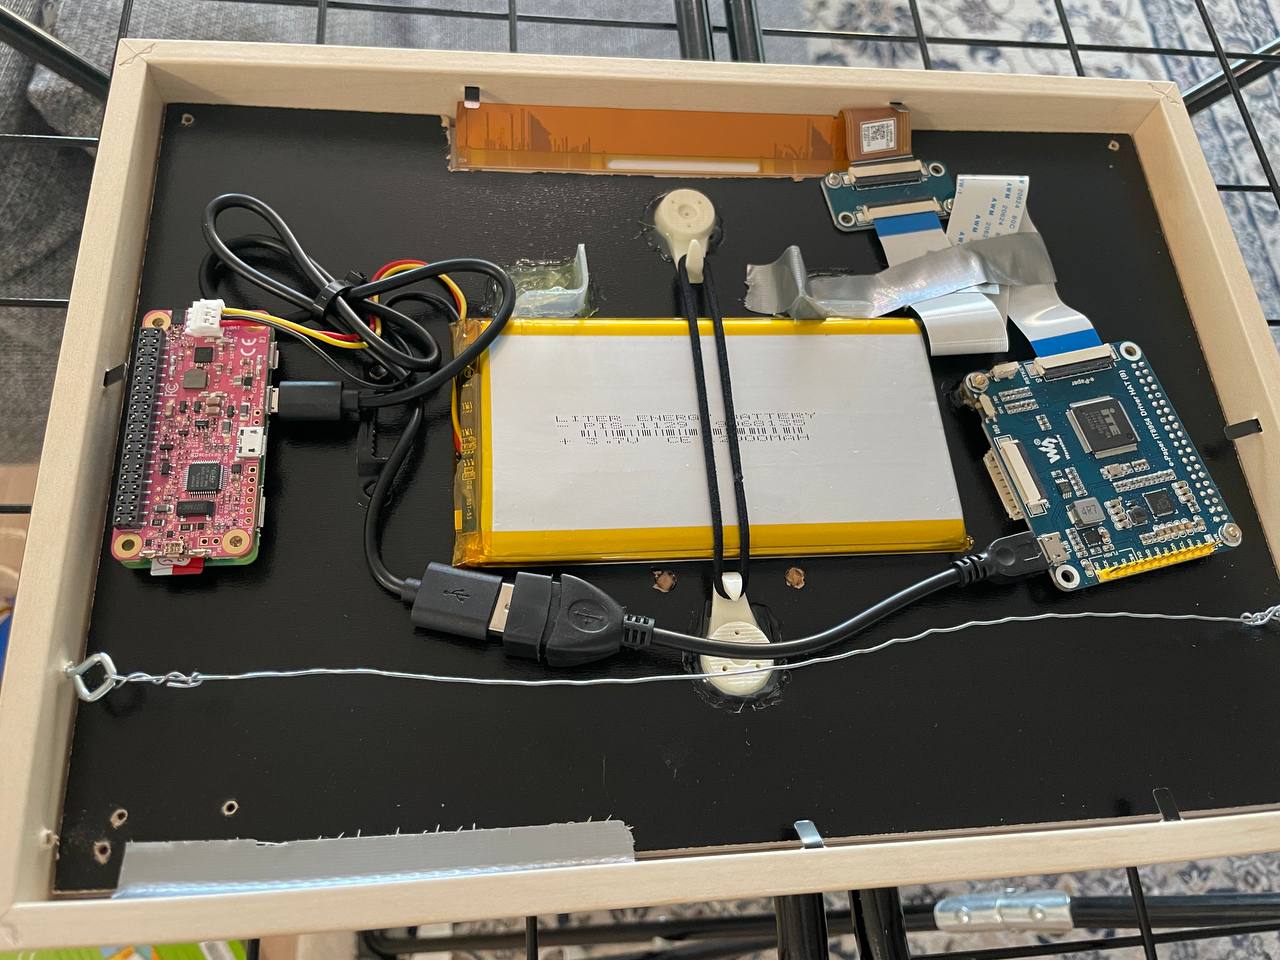
Tada! Components were able to fit almost perfectly within the 2.9cm thick IKEA Frame. Out of the 2.9cm of thickness, approximately 2cm was left for the actual components.
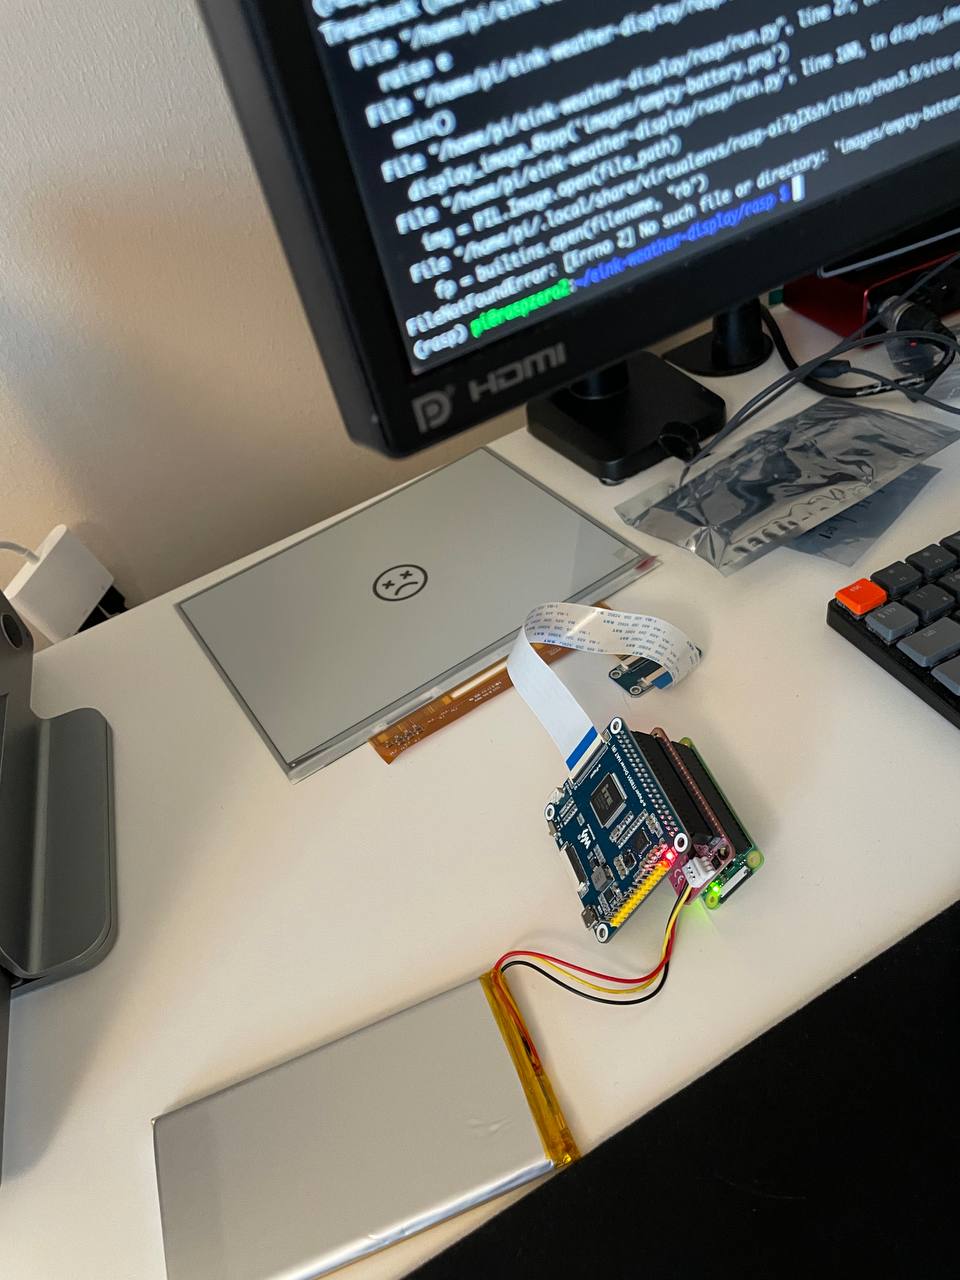
I was super worried about component damage after the desoldering amateur hour, but fortunately everything still worked.
Finally, I tested a few error cases.
![]()
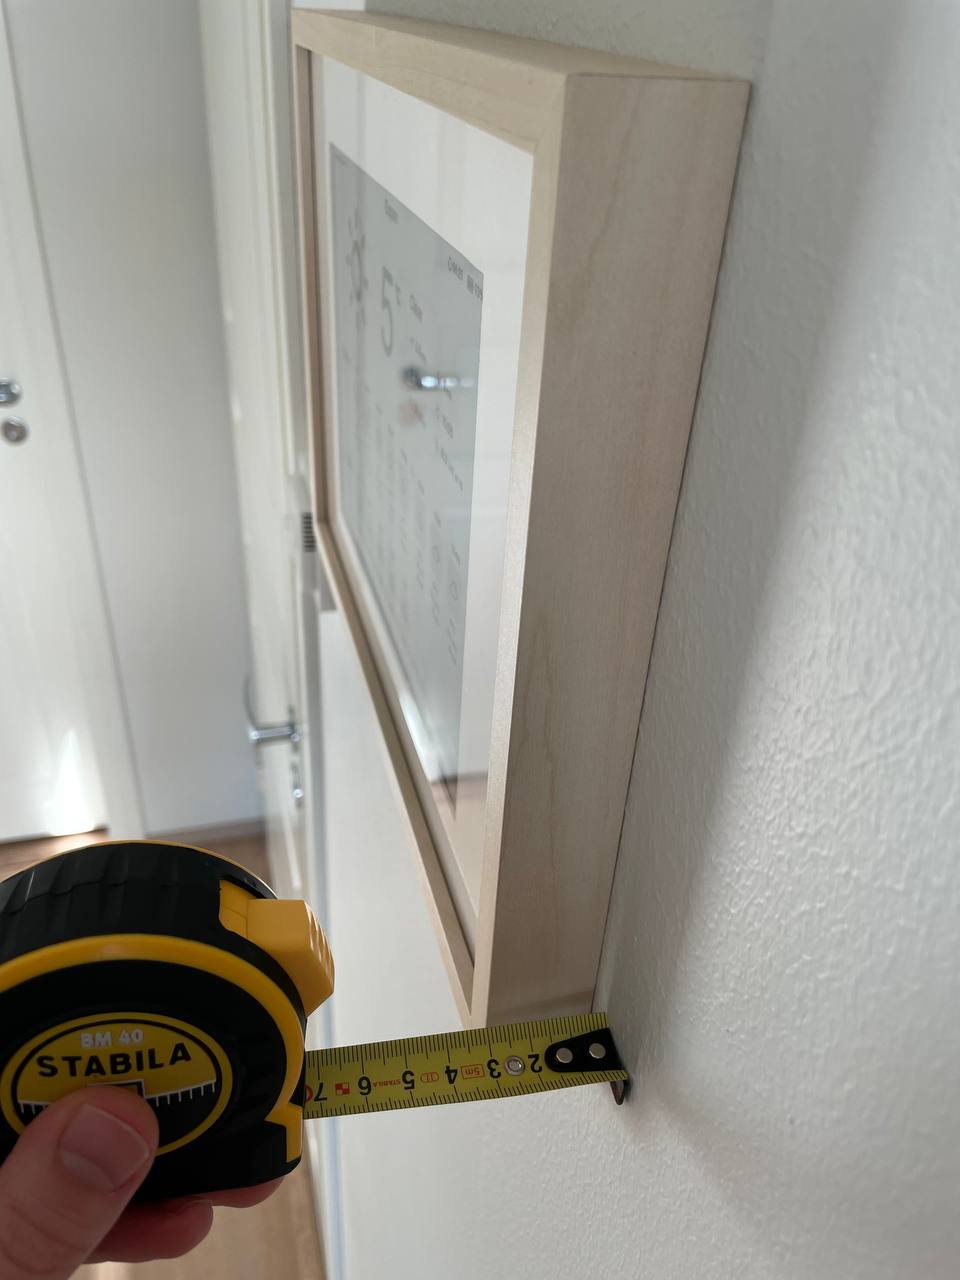
Those done, it was time to mount the frame on our wall.
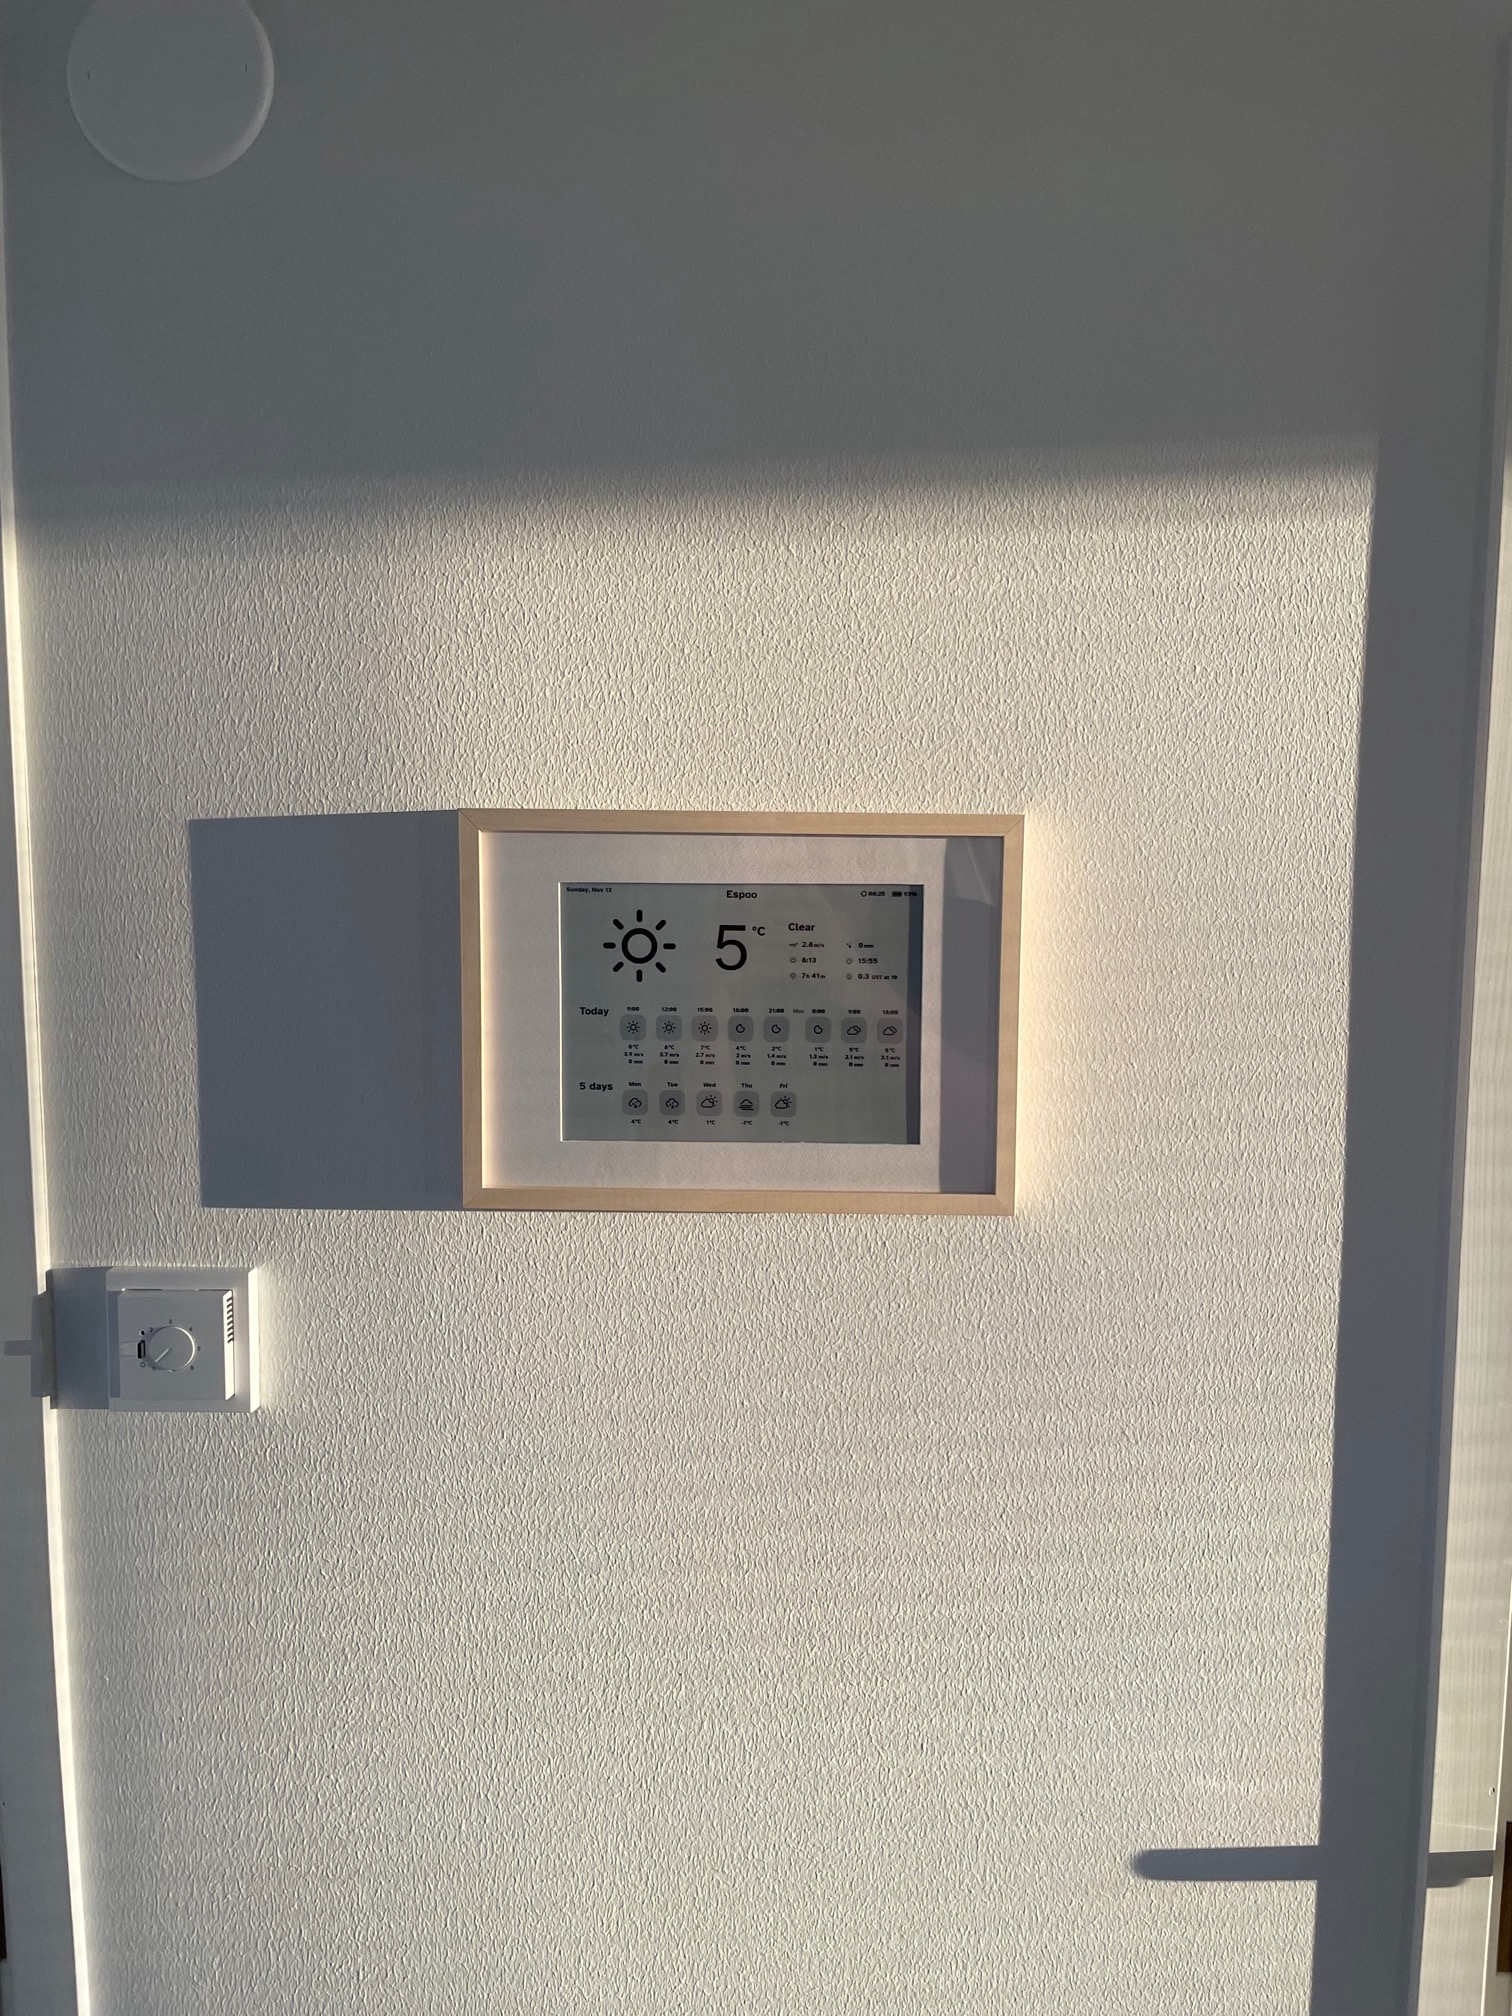
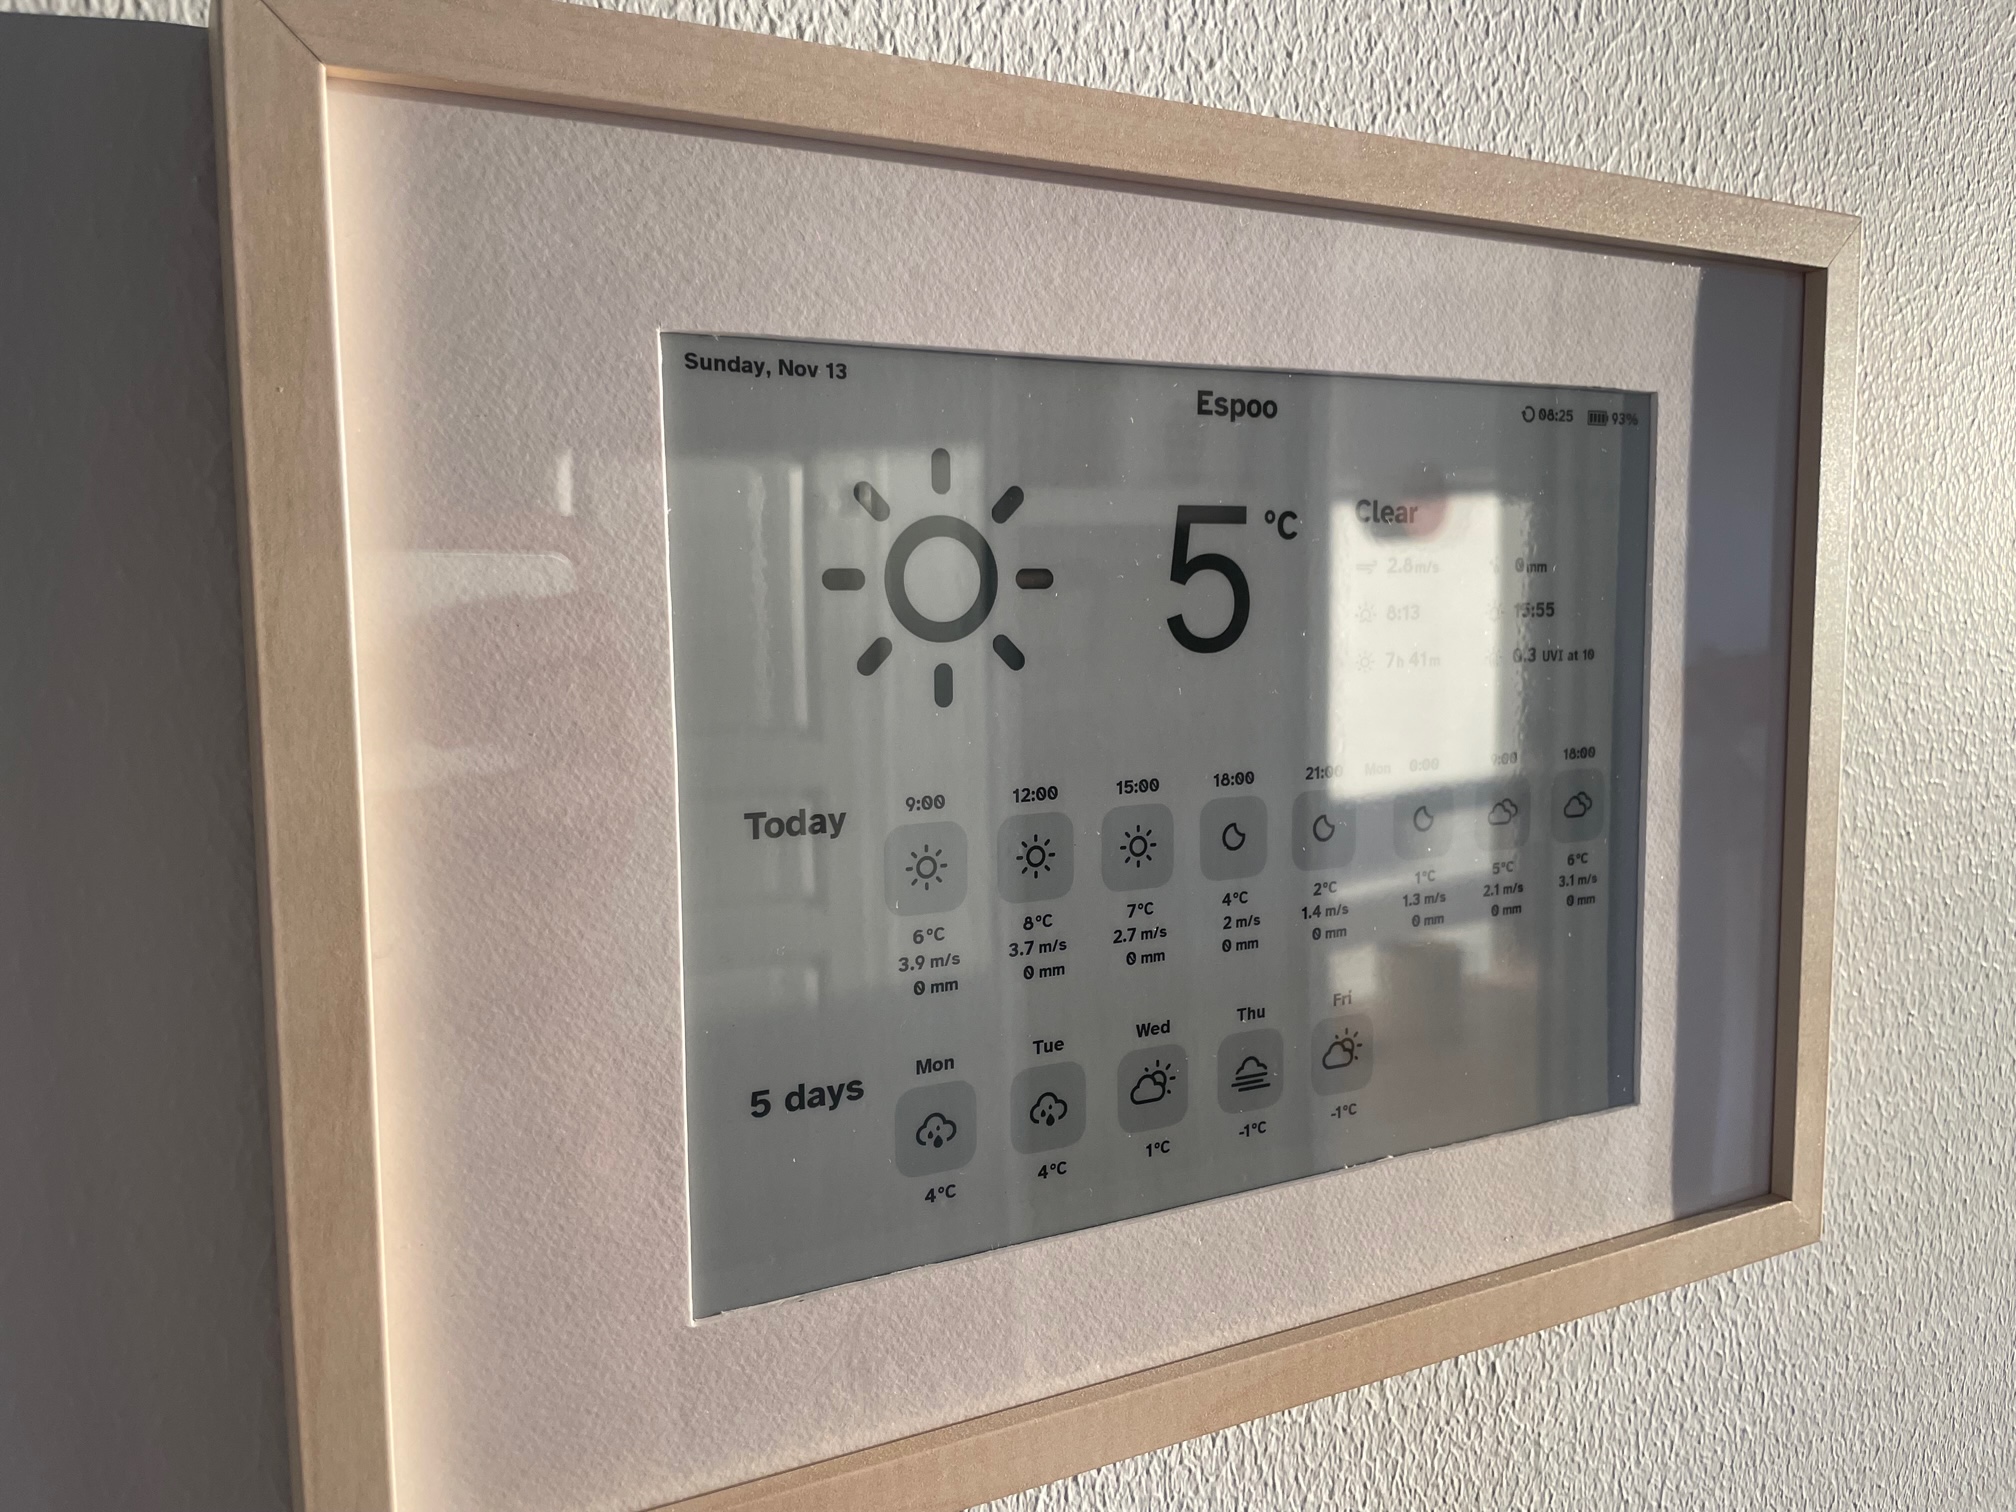
I really like the end result. The IKEA frame has a white cardboard border, which we ended up cutting to fit the screen. To not have mismatching aspect ratios of the white cardboard border and the frame itself, I sacrificed a few vertical pixels of the e-ink display. The white cover board opening is vertically shorter than what the e-ink display is capable of, leaving some Y-pixels unused. A bit of a shame, but the overall look is most important!
One option I considered was to saw the frame to be a perfect fit for the screen. However, it could've lead to a messy end result and it was much easier to mount everything to the back cover with the extra space.
The project took 3 weeks in calendar time. I was positively surprised about the quick turnaround time. It didn't happen by chance though. I purposely chose familiar hardware and software to make the development easier. The idea was to actually finish the project, even though lower-level tinkering would've been educational and beneficial.
That's everything, it was fun!
Hardware list for reference
- Raspberry Pi Zero W
- PiJuice Zero
- PiJuice 12000mAh battery. As large as possible to avoid having to charge the device often.
- Waveshare 10.3" 1872x1404 e-ink display with Raspberry Pi HAT. Supports 16 shades of black and white.
- Geekworm Raspberry Pi Installation Tool 132 Pcs. For a set of spacers and screws that fit Raspberry Pi projects nicely.
- Micro-usb to USB adapter
- USB to micro-usb cable
- IKEA Hovsta Frame
- Misc building items: hot glue, hair band to hold the battery, wall mounting hooks, small plastic box cut to pieces to support the battery from below, and of course duct tape.
Hardware bought but not needed in the end:
- GeeekPi Micro Connectors Raspberry Pi 40-pin GPIO 1 to 2 Expansion Board. To connect PiJuice and e-ink display nicely.
- GPIO Cable for Raspberry Pi 40 Pin. To allow a bit more flexibility inside the build.

